| | I am THRILLED to announce that I am the newest member of the Lunaria Gallery! Located in Silverton, Oregon, the gallery showcases the work of contemporary local artists from the region. It is truly an incredible honor to exhibit and sell my work among such a talented group. https://lunariagallery.com/ |
|
0 Comments
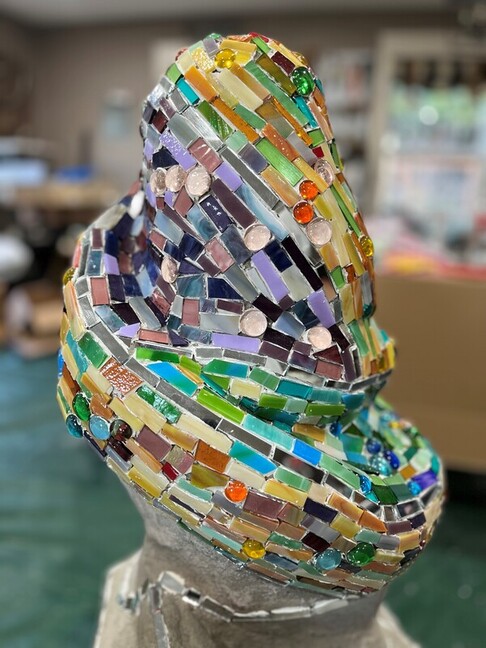
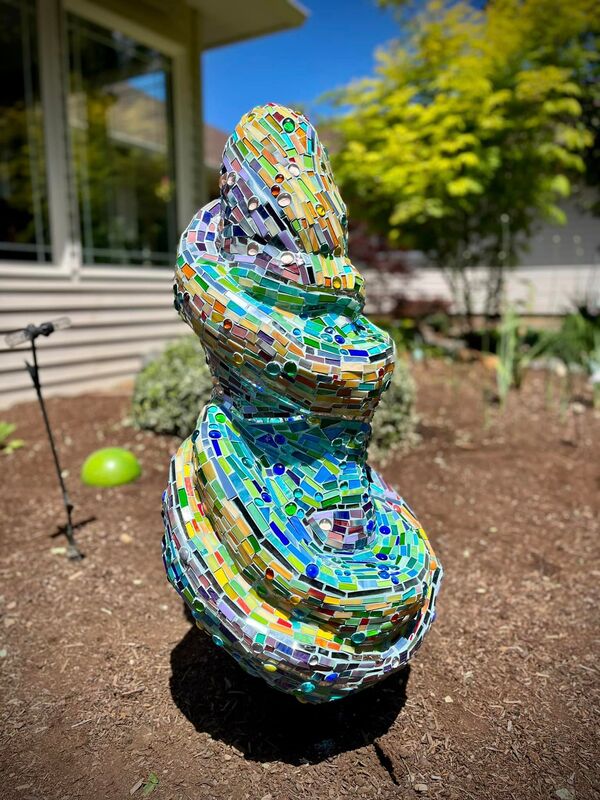
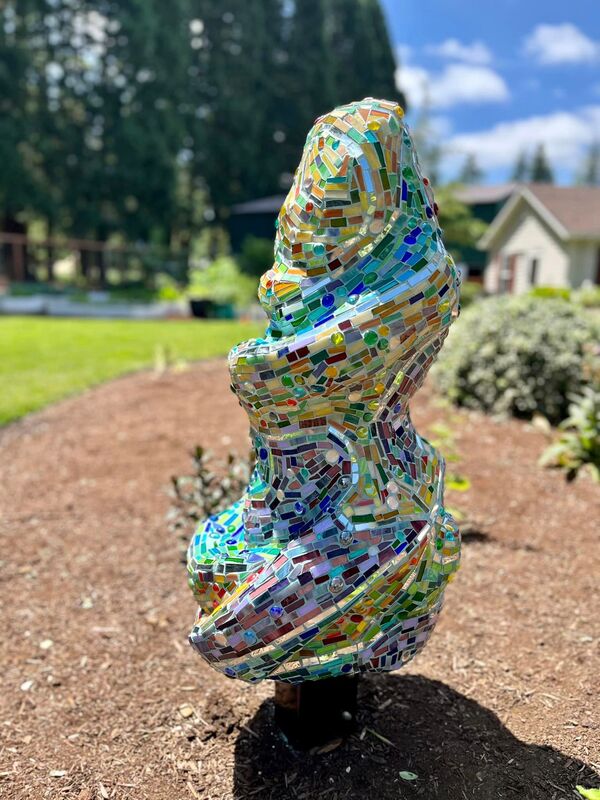
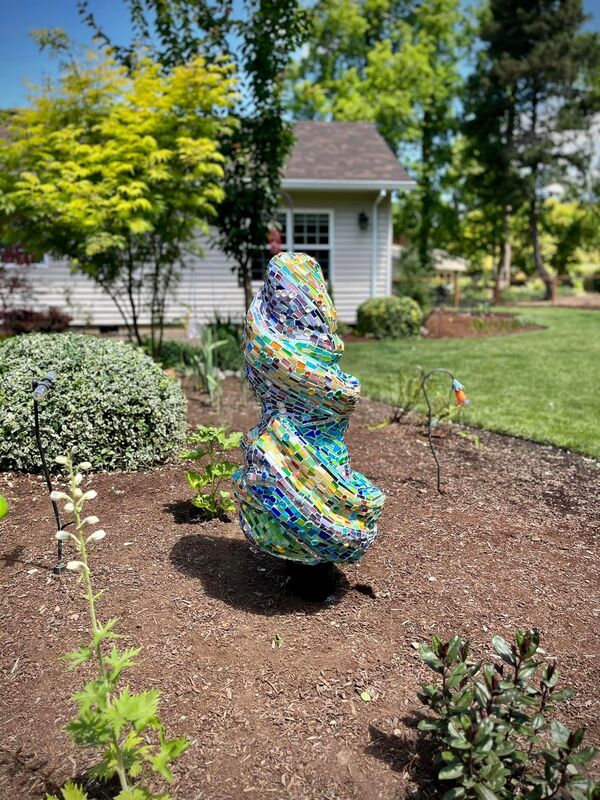
Started in California and completed in Oregon, this sculpture was a study in full coverage mosaic. I am absolutely thrilled with how this has turned out. I will be looking to update my website with a landing page for both my gallery work and my public art. Watch for that and more sculptures to complete and make it to the web soon!
 I'm already in the studio and continuing my work on the large mosaic sculpture that I started on before my move. What's hysterical was the look on the movers face moving this big ol' half covered, half armature concrete THING. I've been working in my studio and had the lovely company of some of my new friends. One of them is my neighbor Marg who was inspired to create her own concrete mosaic sculpture - which is very ambitious! It's almost 4 feet tall! I love to see her dig in and master this craft and it's been fantastic sharing my passion with her. And... on a cold and rainy day it's great to have a studio to go to to make your own little sunshine happen. Guess who is now the Programming Director for the local arts association. Yup. I'm jumping right in and trying to help make something happen in Silverton. The Arts Association is centrally located in the Coolidge McClaine Park. COVID disrupted a good thing and it's time to squash COVID and make things happen again.
I'd love to be teaching sculpture but the space is not really have industrial arts space but we will try and find space for that all in due time. In the meantime... I'm busy trying to get a Spring quarter up off the ground. We have artists/teachers to meet, schedules to make, a communications plan to firm up, and classes to get posted for enrollment. So much to do and so little time. 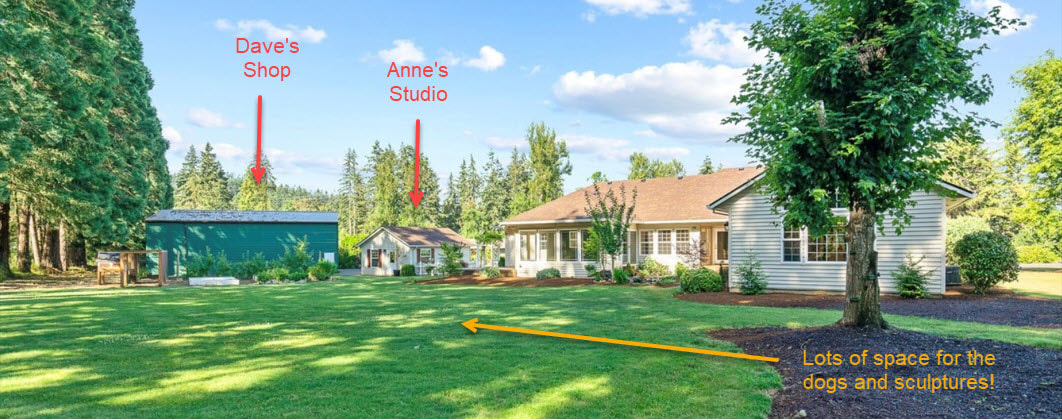 We've picked it all up - our entire lives - and moved it to Silverton, Oregon! That's right and we found a perfect property to afford us the space to TIG, MIG, Plasma Cut, and all that good stuff! Anne now has a studio comparable to the space she shared with artist, Anita Wiglesworth. Dave has a nice 1500 square foot shop where he can work on motorcycles to his hearts content. The community is amazing and we are thrilled to have found our little slice of heaven.
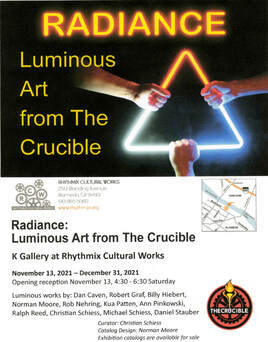 I've always had tremendous respect for the individuals who have grown my mind and shaped my Fine Art career: Henry Hopkins first and foremost. I will never forget that man, his friendship, and his immense belief in me and my capacity as an artist. We could talk for hours about art, the world, the community, ourselves. I miss you Henry! George Herms really excited my mind and introduced me to found objects. He forever changed the way I look at dumpsters. He taught me how to work at scale and to not fear scale. It was because of him I learned how to weld and work with metal. 25 years ago I started to study neon with Christian Schiess at The Crucible in Berkeley, CA. I was thinking about using neon to illuminate my metal sculptures with it's vibrant ambient light. However, I went on to couple the neon with found objects - a practice I continue in my work today. When a teacher of yours invites you to exhibit your work alongside his, you jump at the opportunity. I am thrilled to be participating in this exhibition with Christian, and many of the amazing artists working with light that I've had the pleasure of collaborating with at The Crucible: Robert Graf, Norman Moore, Dan Cavin, and Kua Patten. RADIANCE
Rhythmix Cultural Works 2513 Blanding Ave Alameda, CA 94501 Opening Reception: November 13th 4:30-6:30pm Please come to the show! So I am off to try something new! I've been wanting to work with concrete again. I worked with this medium a little bit when I was in college. It was a study combining concrete with fired ceramics. Now I'm looking to make a little sculpture to experiment with concrete and glass mosaic. 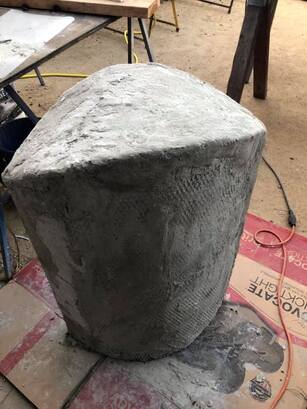 I built an armature using stucco lath (also called stucco mesh, or stucco netting) and I filled it with cardboard because I knew that I wanted this to be hollow to help with the overall weight of the piece. I then did some research on sculptable concrete. There wasn't a lot of information out on the internet about this but I did find a YouTube video posted by dperry428 that worked great! This mixture actually works a lot like clay. I fist applied a skim coat onto the piece as pictured. Ingredients: portland cement - 10 cups fine sand - 5 cups metakaolin - 2 cups PVA fiber - 3/4 cup Mix all the dry ingredients. Mix in the liquid (3 parts water, 1 part acrylic admix) 5 cups Add more liquid by hand to reach the texture and viscosity you desire for your sculpture 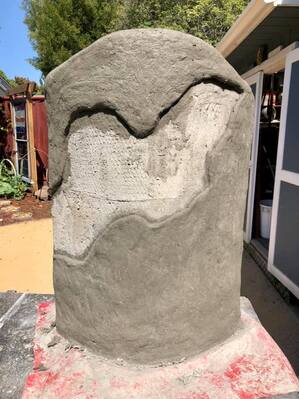 After the skim coat had dried, I came back and applied another layer of concrete. I intentionally left a recessed area that I intended to fill with glass mosaic. 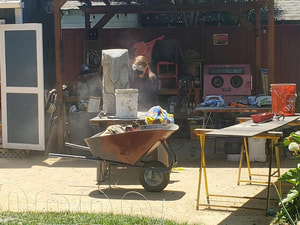 Once dry, I used an orbital hand sander to sand the piece. The PVA fiber threads were then burned off using a propane torch. 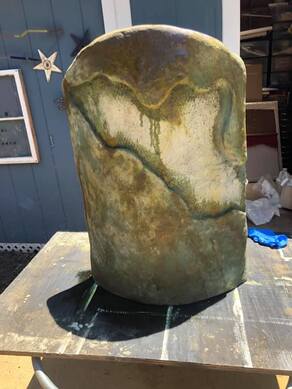 I then applied an assortment of acid stains from Direct Colors. The colors I ordered in my test kit were: Azure Blue, Avocado ,Sea Grass, Desert Amber, and Coffee Brown. 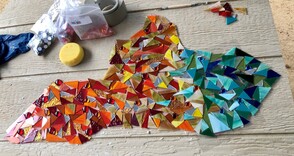 Next I created a template for the mosaic area and composed the glass pieces. 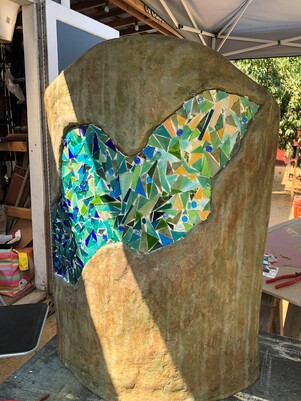 I used white thinset so that there was the ultimate reflection of light through the glass. I worked in sections and adhered all the glass to the recessed area in the sculpture. 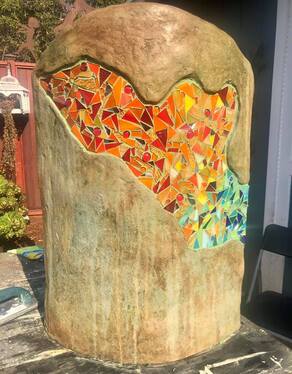 Finally, I applied colorant to the non-sanded grout and grouted the whole piece.
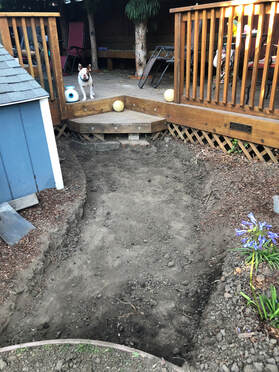
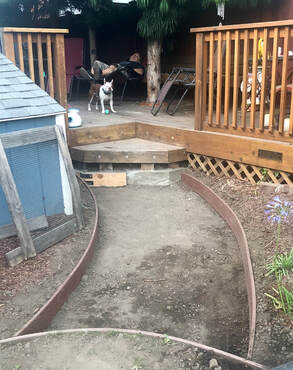
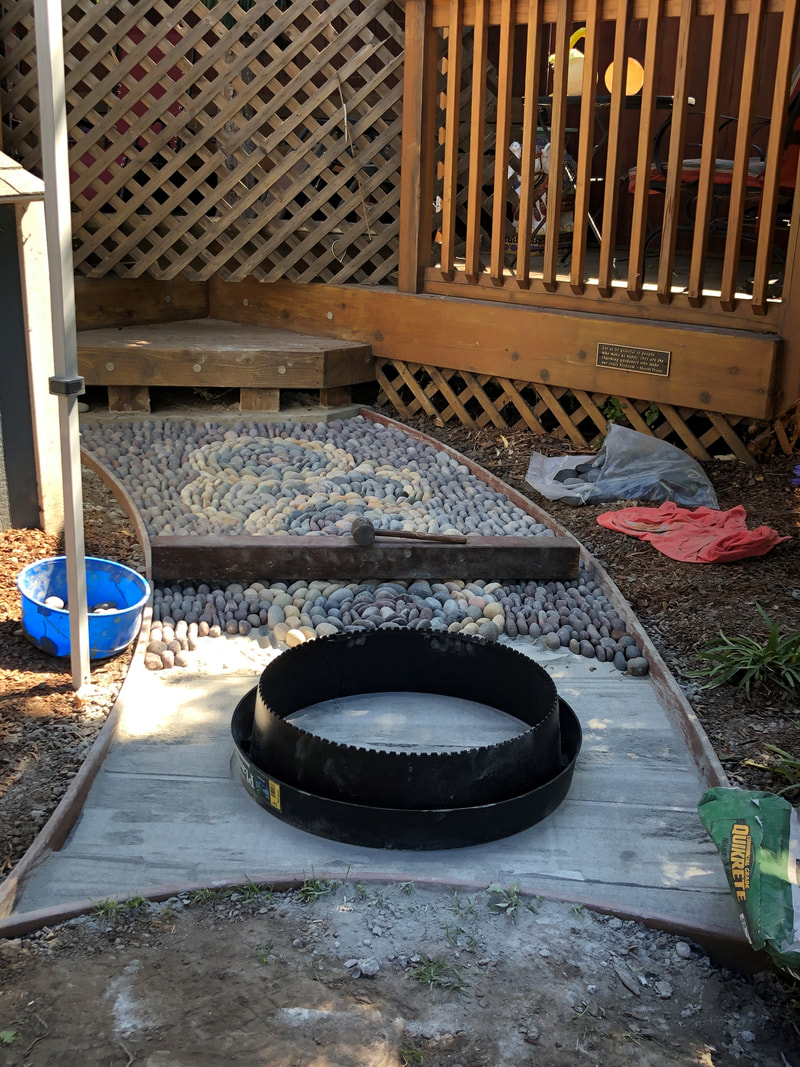
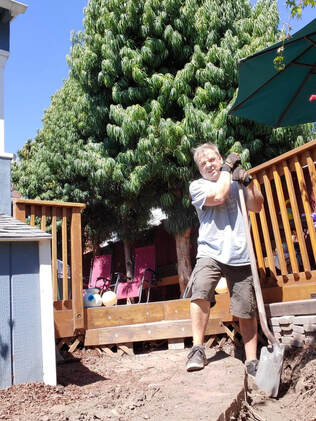 For years, my friends had been tagging me in posts about pebble path mosaics and I was always mesmerized by them. In my lifetime, I have made stained glass windows, wall mosaics, mosaic stepping stones, and other mosaic items, but I had never thought to do a path. Until now... I did a lot of research in order to find out the best way to execute this endeavor and I documented the process that I used, here. My amazing husband started by removing the brick pathway that was there. He excavated to a 6" depth. The finished path would end up being 42" wide by 10' long with a curve as you'll see below. Once the approximate shape was sorted out, we purchased 1'"x6" bender board to lay it in as our edge support. This required more digging and backfilling in areas where the original path wasn't correct. NOTE: When leveling, your bender board should be level across as it will serve as your guide in later steps. It should slope away from your house by at least 2% grade which we didn't have to worry about because we were already dealing with a slope.
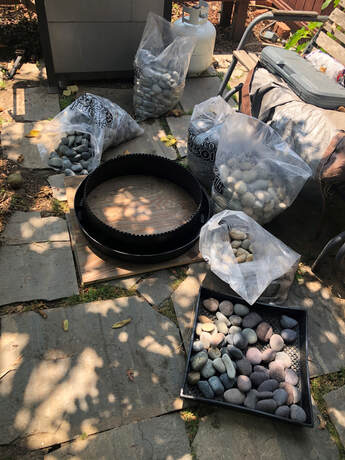
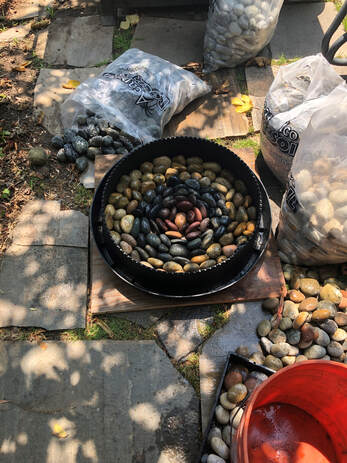
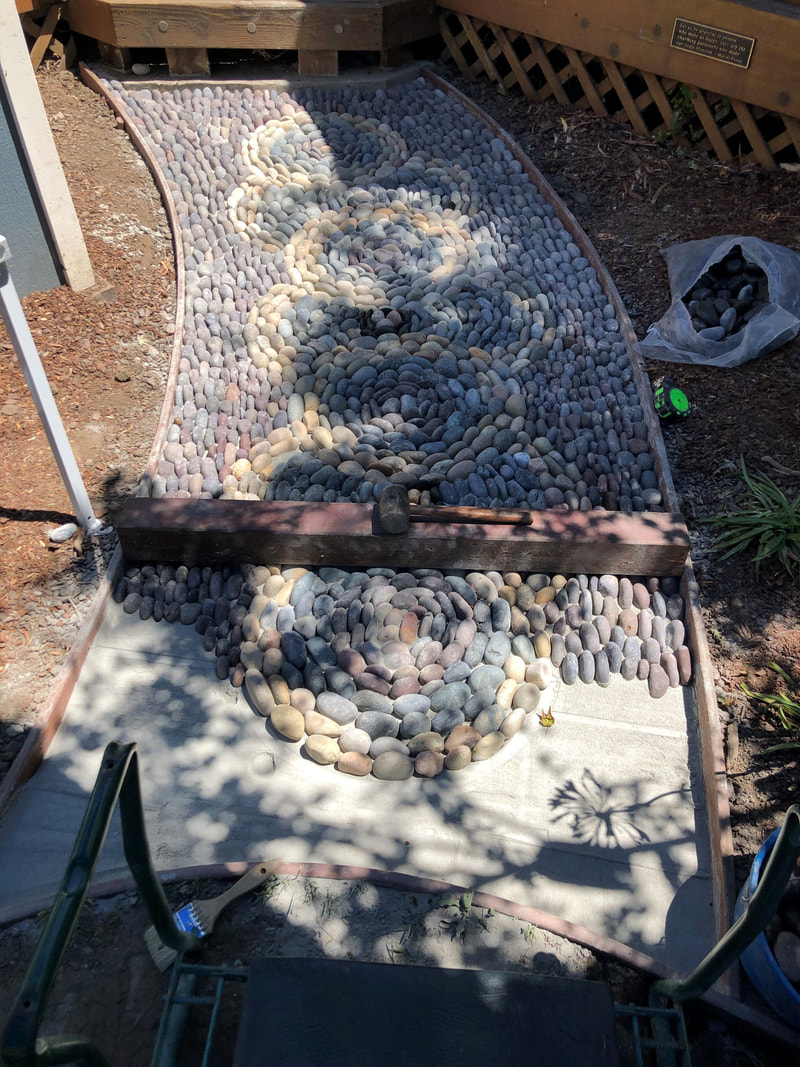
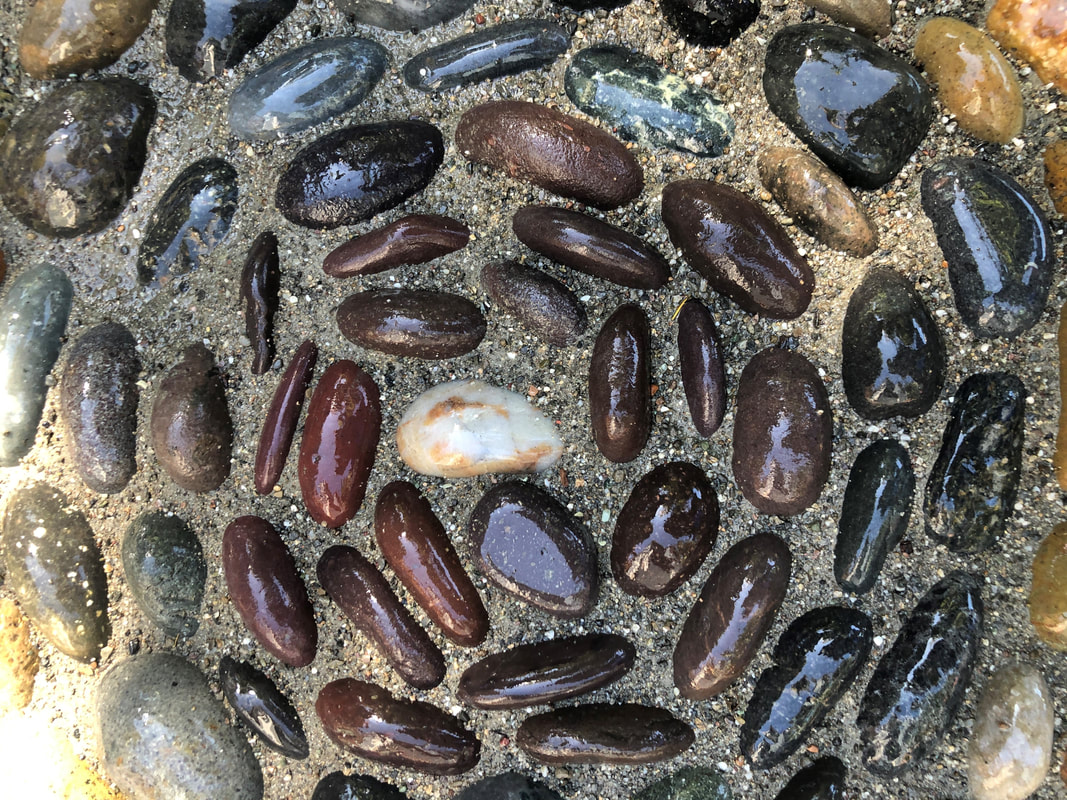
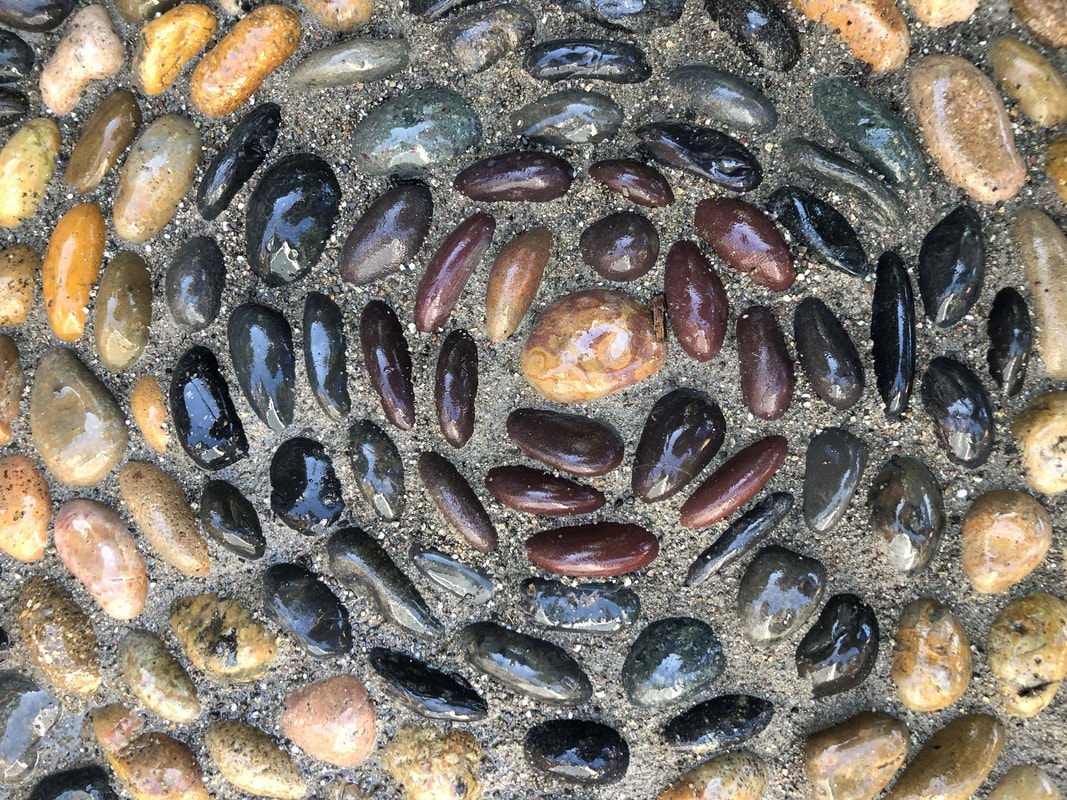
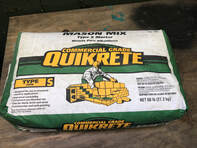 Once you have the site prepped and bender board installed, you should fill the space with 2" of dirt, base rock, or sand. We decided to sift the dirt that we had removed and used a steel tamper to tamp it down. We didn't feel this path received enough traffic to warrant base rock. Your goal would be to have only 4" depth from the top of your bender board. We learned the hard way, I figured we'd need more, so you'll see my finished product has a lip. I think aesthetically it would be more pleasing if there were less of a lip. If I were to do another path, I would do it this way. Instead, we only filled with 1" dirt, leaving 5 inches from the top of the bender board. 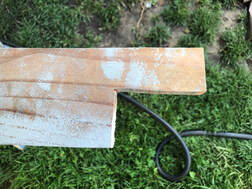 Next, it's time to lay down type S Mason Mix. I worked on my mosaic dry because I didn't want to be rushed. In my research I did see that some people work on their mosaic wet. I would have HATED to be rushed so while I didn't find many resources who worked dry, I figured I'd take my chances. I used a guide to insure that my depth from the top of the bender board to the top of the mortar was consistent at 2 inches. This means, I started with approximately 3 inches of dry mortar. I tried to work in 2-3 foot sections so that I could kneel on the dirt and reach the areas as I laid in the rock. I used some wood pieces against my kneeler to keep the mortar level. 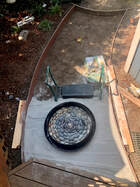 I purchased my rock at Acapulco Rock & Soil in Richmond, CA. I bought 1"-2" Mexican Pebble in three colors: buff, red and black. I bought these by the bag (75 pounds each) - 2 each of each color. I ended up using more red so I needed to go back and get another 2 bags of red pebble. I used forms to help me create somewhat consistent circles. I arranged the pebbles under my fig tree where I could lay out my rocks and wet them to see their vibrant colors. As you can see in the photos below, when the rocks are dry are hard to discern their true beauty. I worked on a small piece of wood barely larger than my form which would allow me to arrange the rocks and then carry the completed concentric circle mandalas over to the path area (which was in full sun!)
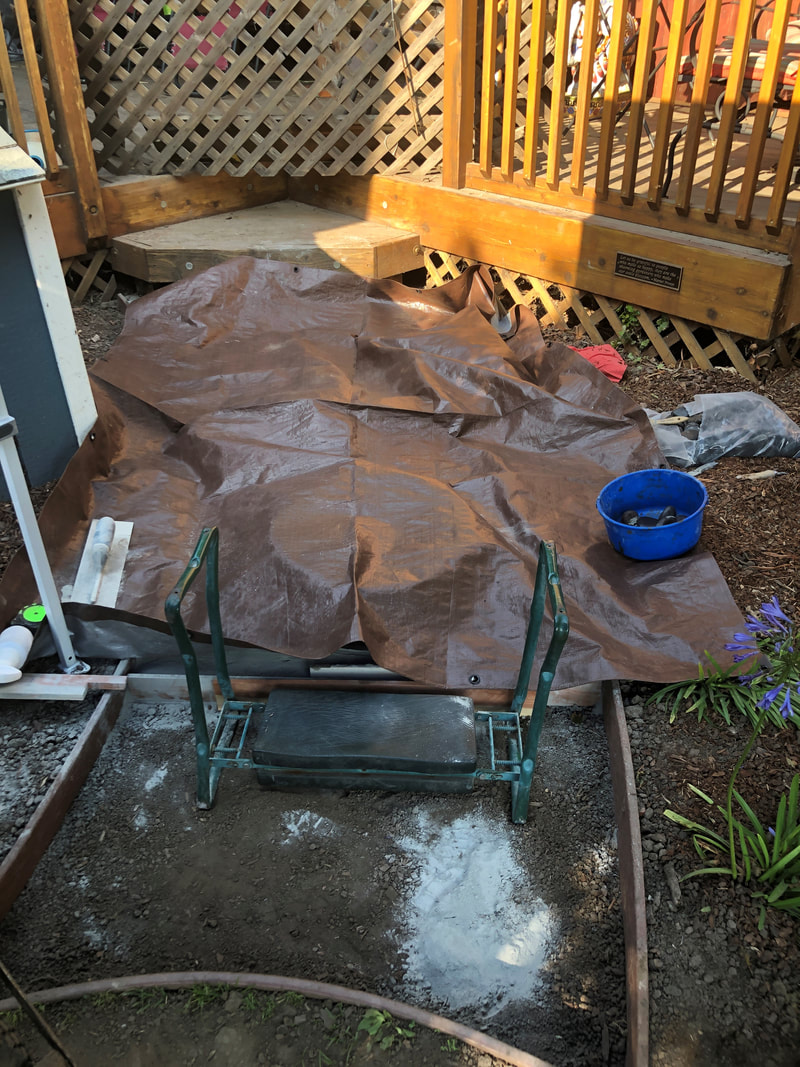
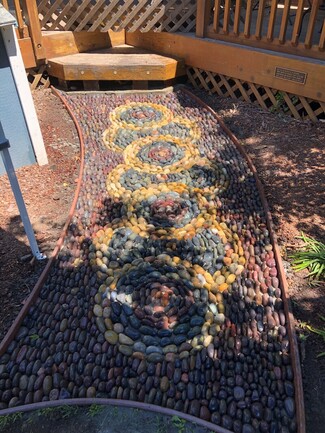
I repeated this process and worked my way down the path but before moving along to the next section, I used a 4x4 and a rubber mallet to make sure that the rocks were all level (more or less) and that there weren't pebbles sticking up that would be a trip hazard later on. At night, I covered my project with a tarp to make sure that the morning dew wouldn't get on the dry mortar. I continued until all the pebbles were laid in the path area. It was now time to wet the path. So... how much water is enough? We wet the path until the water pooled atop the mortar momentarily. Once it pooled, we let the water soak in and stopped applying more water. Since we wet the path early in the day, we again wet the path later in the afternoon to slow the drying process and create a stronger cure.
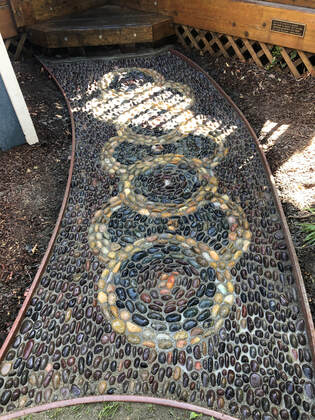
The mortar was left to dry overnight, uncovered. When I woke up I checked the mortar and it was hard. I stepped on a corner to make sure that it was strong enough to continue and it was! So... it was now time for deck mud. Deck mud, or "topping mix", is 3 parts sand and 1 part Portland cement. I poured this onto the dry path and swept it until the rocks were exposed to the depth that I desired. Once it was all filled into the gaps, I wet the deck mud. That's it right??? WRONG! Now it's time to clean up! I made one heck of a mess and all this 'stuff' needs to go back into their resting places. Since it was a sunny weekend, I borrowed an E-Z Up from my neighbors so that that I could take breaks and rest in the shade. 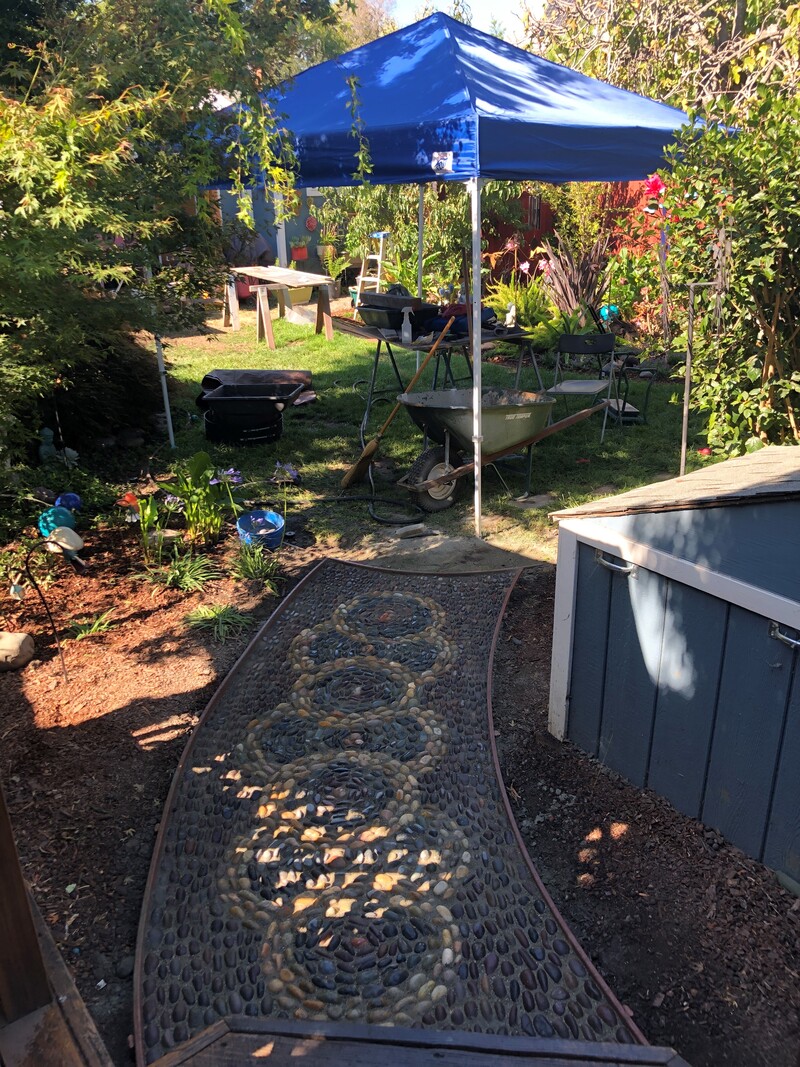 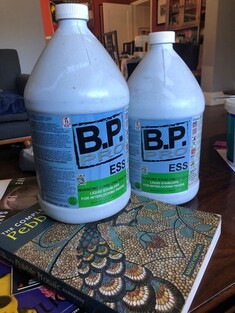 Finally... in order to maintain the 'wet' look and see the pebble in all it's glory, the entire path needs to be sealed. We have some leftover stabilizer from when we had our pavers installed, so I'm going to try with that to see what that produces. This will dry a semi-gloss. It also prevents weeds from growing in the deck mud. I will seal the path in a week to give it time to cure properly.
The approximate cost for this project was $300. Here is a list of the material used in this project: 1"-2" Mexican pebble (8 75# bags) Mason Mix (60#) - 8 bags Deck Mud (50#) - 1 bag 1"x6"x20' bender board  Running July 8th - August 30th, the "Annual Carnegie Arts Showcase" exhibition will showcase new work in a variety of media by California artists in the Central Valley.
This show will be judged by: Susanne French, ceramic artist& Art Gallery Director, Merced College Susan Stephenson, painter & Assistant Professor of Art, CSU Stanislaus Young Suh, photographer& Associate Professor of Art, UC Davis The show will be held at the Carnegie Arts Center which was once the historic Carnegie Library which opened in 1916 and was built by Andrew Carnegie. It served as the City of Turlock’s library until 1968 and has been used as an arts center since 1979. Central California Arts Showcase Carnegie Arts Center 250 N. Broadway, Turlock, California  Exploding Time is selected for display in a show called, "Radiance: Luminous Art from the Crucible" at the K Gallery. The K Gallery is a branch of the community art center Rhythmix Cultural Works, the gallery's exhibits celebrate the vitality of the local cultural arts community.
The current dates for this exhibition are unknown are awaiting guidance from the state/county as a result of the Covid-19 pandemic. |
 About me...
I work in the IT industry by day managing a team of software developers at Stanford University. I very much enjoy what I do. Technology changes as quickly as it gets boring so this career is suited perfectly for me. Archives
February 2024
Categories |
 RSS Feed